
 I don’t know why, but Cafe Americano was never on my radar, and I didn’t really know anything about it. But when I had friends over last year, and I was making coffee for them with my Mr. Coffee Cafe Barista Espresso and Cappuccino maker, one requested Cafe Americano. Real quick he taught me how to make a cafe americano. I tried it myself, and now it’s my new favorite coffee every morning, using my espresso maker.
What is Cafe Americano?
Cafe Americano is the Italian and Spanish phrase for “American coffee.” It’s an espresso shot diluted with hot water, making it more akin to a regular cup of joe, like from a Keurig or drip coffee maker. Legend has it that during WWII, American soldiers in Italy would order an espresso and then dilute it with hot water to make it more like their normal coffee back home.
This past winter I was wanting a milder coffee than my normal cappuccino’s and was actually looking into getting a drip coffee maker, but I really don’t want two main coffee makers on my counter. So this is the perfect solution. I was also wanting a break from consuming all the milk and non-dairy milks that were in my cappuccino’s – too much milk too often (I drink several cups a day). Making a cafe americano allows me to put in just a tiny bit of half-and-half or any milk I desire at the moment. Or I can drink it black for a no-calorie option.
“Long Black” is the Australasian term for a drink just like a cafe americano – only they pour the hot water first and then add the espresso. For a regular espresso they use the term “Short Black.”
As a kind of joke recently, Russia proposed they rename cafe americano a “Russiano” in their country. I don’t think it ever took, though, but maybe in their own country.
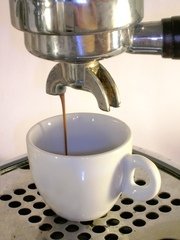
How to make Cafe Americano
Simply pull one or two espresso shots, and dilute it with boiling or hot water. I like mine boiling because I then add a smidgen of half-and-half. You’ll want to experiment – I’ve found that just adding a little bit of hot water makes for a full-flavored cafe americano – like about 1/4 to 1/3 cup. Some people might want to dilute it a bit more, and the strength and flavor also depends on which grounds you are using. So far my favorite is Lavazza Perfetto Espresso Roast. When I want something a little milder I use my Lavazza Classico Medium Roast.
This is just one of the various specialty coffees we can make with an espresso and cappuccino machine.
You can find lots of great Lavazza coffees (one of my all-time favorite brands) at Amazon.com and Walmart.com.
Iced Cafe Americano
What if you want an iced cafe americano? Simply pull your shot(s), then dilute it with cold water and ice and any other additions you want (cream or sugar). Voila!
How to make Cafe Americano unique and different
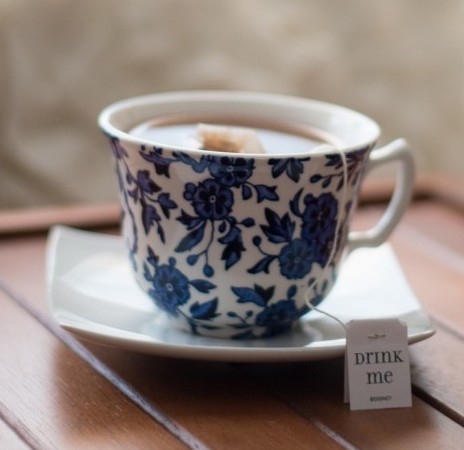
This past winter when I was sometimes on the verge of a cold, I discovered (invented?) Herbal Coffees – check out my post here. I learned to make these with cafe americano – after all, adding boiling water is similar to making tea. I had fun letting my Herbal Cafe Americano slowly transform into tea, then I’d add another shot or two of espresso and transition it back into a cafe americano, etc.
If you do that method you can add all sorts of interesting and unique flavors to your cafe americano just by using interesting tea bags – like Blackberry, Blueberry, Lavender, Vanilla, Blood Orange or Cinnamon. Of course, you can always flavor your cafe americano with coffee syrups, flavored stevia and/or creamers.
If you want to really indulge, make your cafe americano with any flavors (or none), then top it with a dollop of sweet, vanilla freshly-whipped whole cream. I make my own whipped cream – take a cup of whole whipping cream, add a little sweetener (sugar, truvia, etc.), add a dash of vanilla, and whip it with your beaters until it’s thick and little peaks stand up on their own when you lift the beaters out. Yummm.
When you want your espresso maker to make a regular cup of coffee
I contend that a cafe americano from my espresso machine tastes much better than a normal cup of coffee from Keurig or regular coffee maker. There’s just nothing like a deep, dark, full-bodied espresso shot – and I can taste that even when it’s diluted with hot water. I also like how I can pour in boiling water, making sure it is really nice and hot. And right now, while I’m following the Belly Fat Cure eating plan, a tiny bit of half-and-half is all I need for a delicious cup of cafe americano.
Have you made cafe americano? I’d love to hear from you – what are your favorite methods, have you done anything fun and unique with it? Please comment below. 🙂
Hi, I’m Jerilyn Winstead and I’m a writer and coffee snob. You can find my author and writing news and tips as well as life hacks at www.jerilynwinstead.com and all things coffee on this blog. Besides coffee and writing, I love larping (live action role-play) and medieval re-creation, zombies, costuming, reading, all kinds of art mediums (visual art, knitting and spinning, crafting, performing arts), hiking, camping, yoga, hanging out with friends, movies and good TV shows, travel, horse-back riding, cooking, baking and eating gourmet foods and desserts, spirituality and unusual topics – like alchemy, as in my first novel. I am also a mermaid and swim in my mermaid tail whenever I get a chance – especially in our oceans. I also love history and am currently learning about Egypt (ancient and modern) as well as learning how to read and write Egyptian hieroglyphs – so much fun! Sometimes I think I should have been an archaeologist.

 The Bialetti Classic Stainless Steel Moka Pot coffee maker – this iconic espresso maker is known to be in every house in Italy. But the news is out now that the Italian company, Bialetti, is facing possible bankruptcy. Our days to get an original Italian Bialetti moka espresso pot may be numbered.


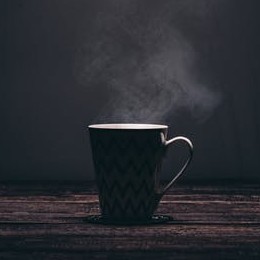
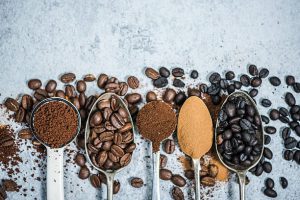
 We love our coffee and some of us love to drink lots of it. But too much, too strong or too caffeinated and it can mess up our digestion with too much acidity. Cultures around the world, though, have found preparation methods to make coffee less acidic. Plus they taste delicious, too.
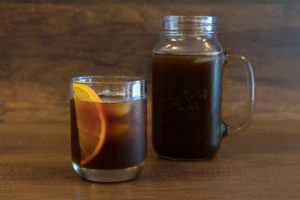

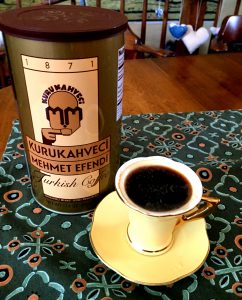
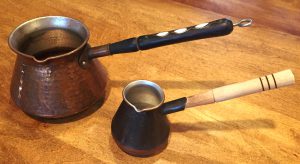 So you’ve discovered the inexpressible delights of rich, smooth Turkish coffee, but you have no
  My husband teases me because I have at least five different methods and tools to make gourmet coffee at home. You don’t have to be rich to try out these delicious ways to brew good coffee. Each one is a taste adventure of its own. These are various methods for preparing delicious coffee – we’ll go into specific beans, roasts or recipes (like Butterbeer Latte), in another post. So we begin our coffee world tour to learn different types of coffee – off to beautiful Paris! (Say it with a French accent: pear-REE.)